

Hi everybody! Happy Wednesday! It's the last day of summer, & I just had to squeeze in one-last warm-weather, nature-inspired project before fall starts tomorrow! 😊

This fun purse was designed with one of my favorite summer berries in mind - strawberries! I couldn't resist turning the bright red, black, & green remnant yarn I had in my stash, into this cute little cinch tassel-tie closure bag!
This is also my 1st crochet pattern I've ever created using the color changing & "carrying" of the colors inside the stitches techniques to create a "smooth" texture inside the bag, (rather then having a bunch of loose ends / knots) so I've included a bunch of step-by-step pics + video tutorial links below to help, for this intermediate level pattern. 👍
For the printable PDF version of this pattern, you can find the inexpensive, condensed, instant-download in my Etsy shop HERE, or keep scrolling down for the full FREE step-by-step photo tutorial below! 😉
Let's get started!

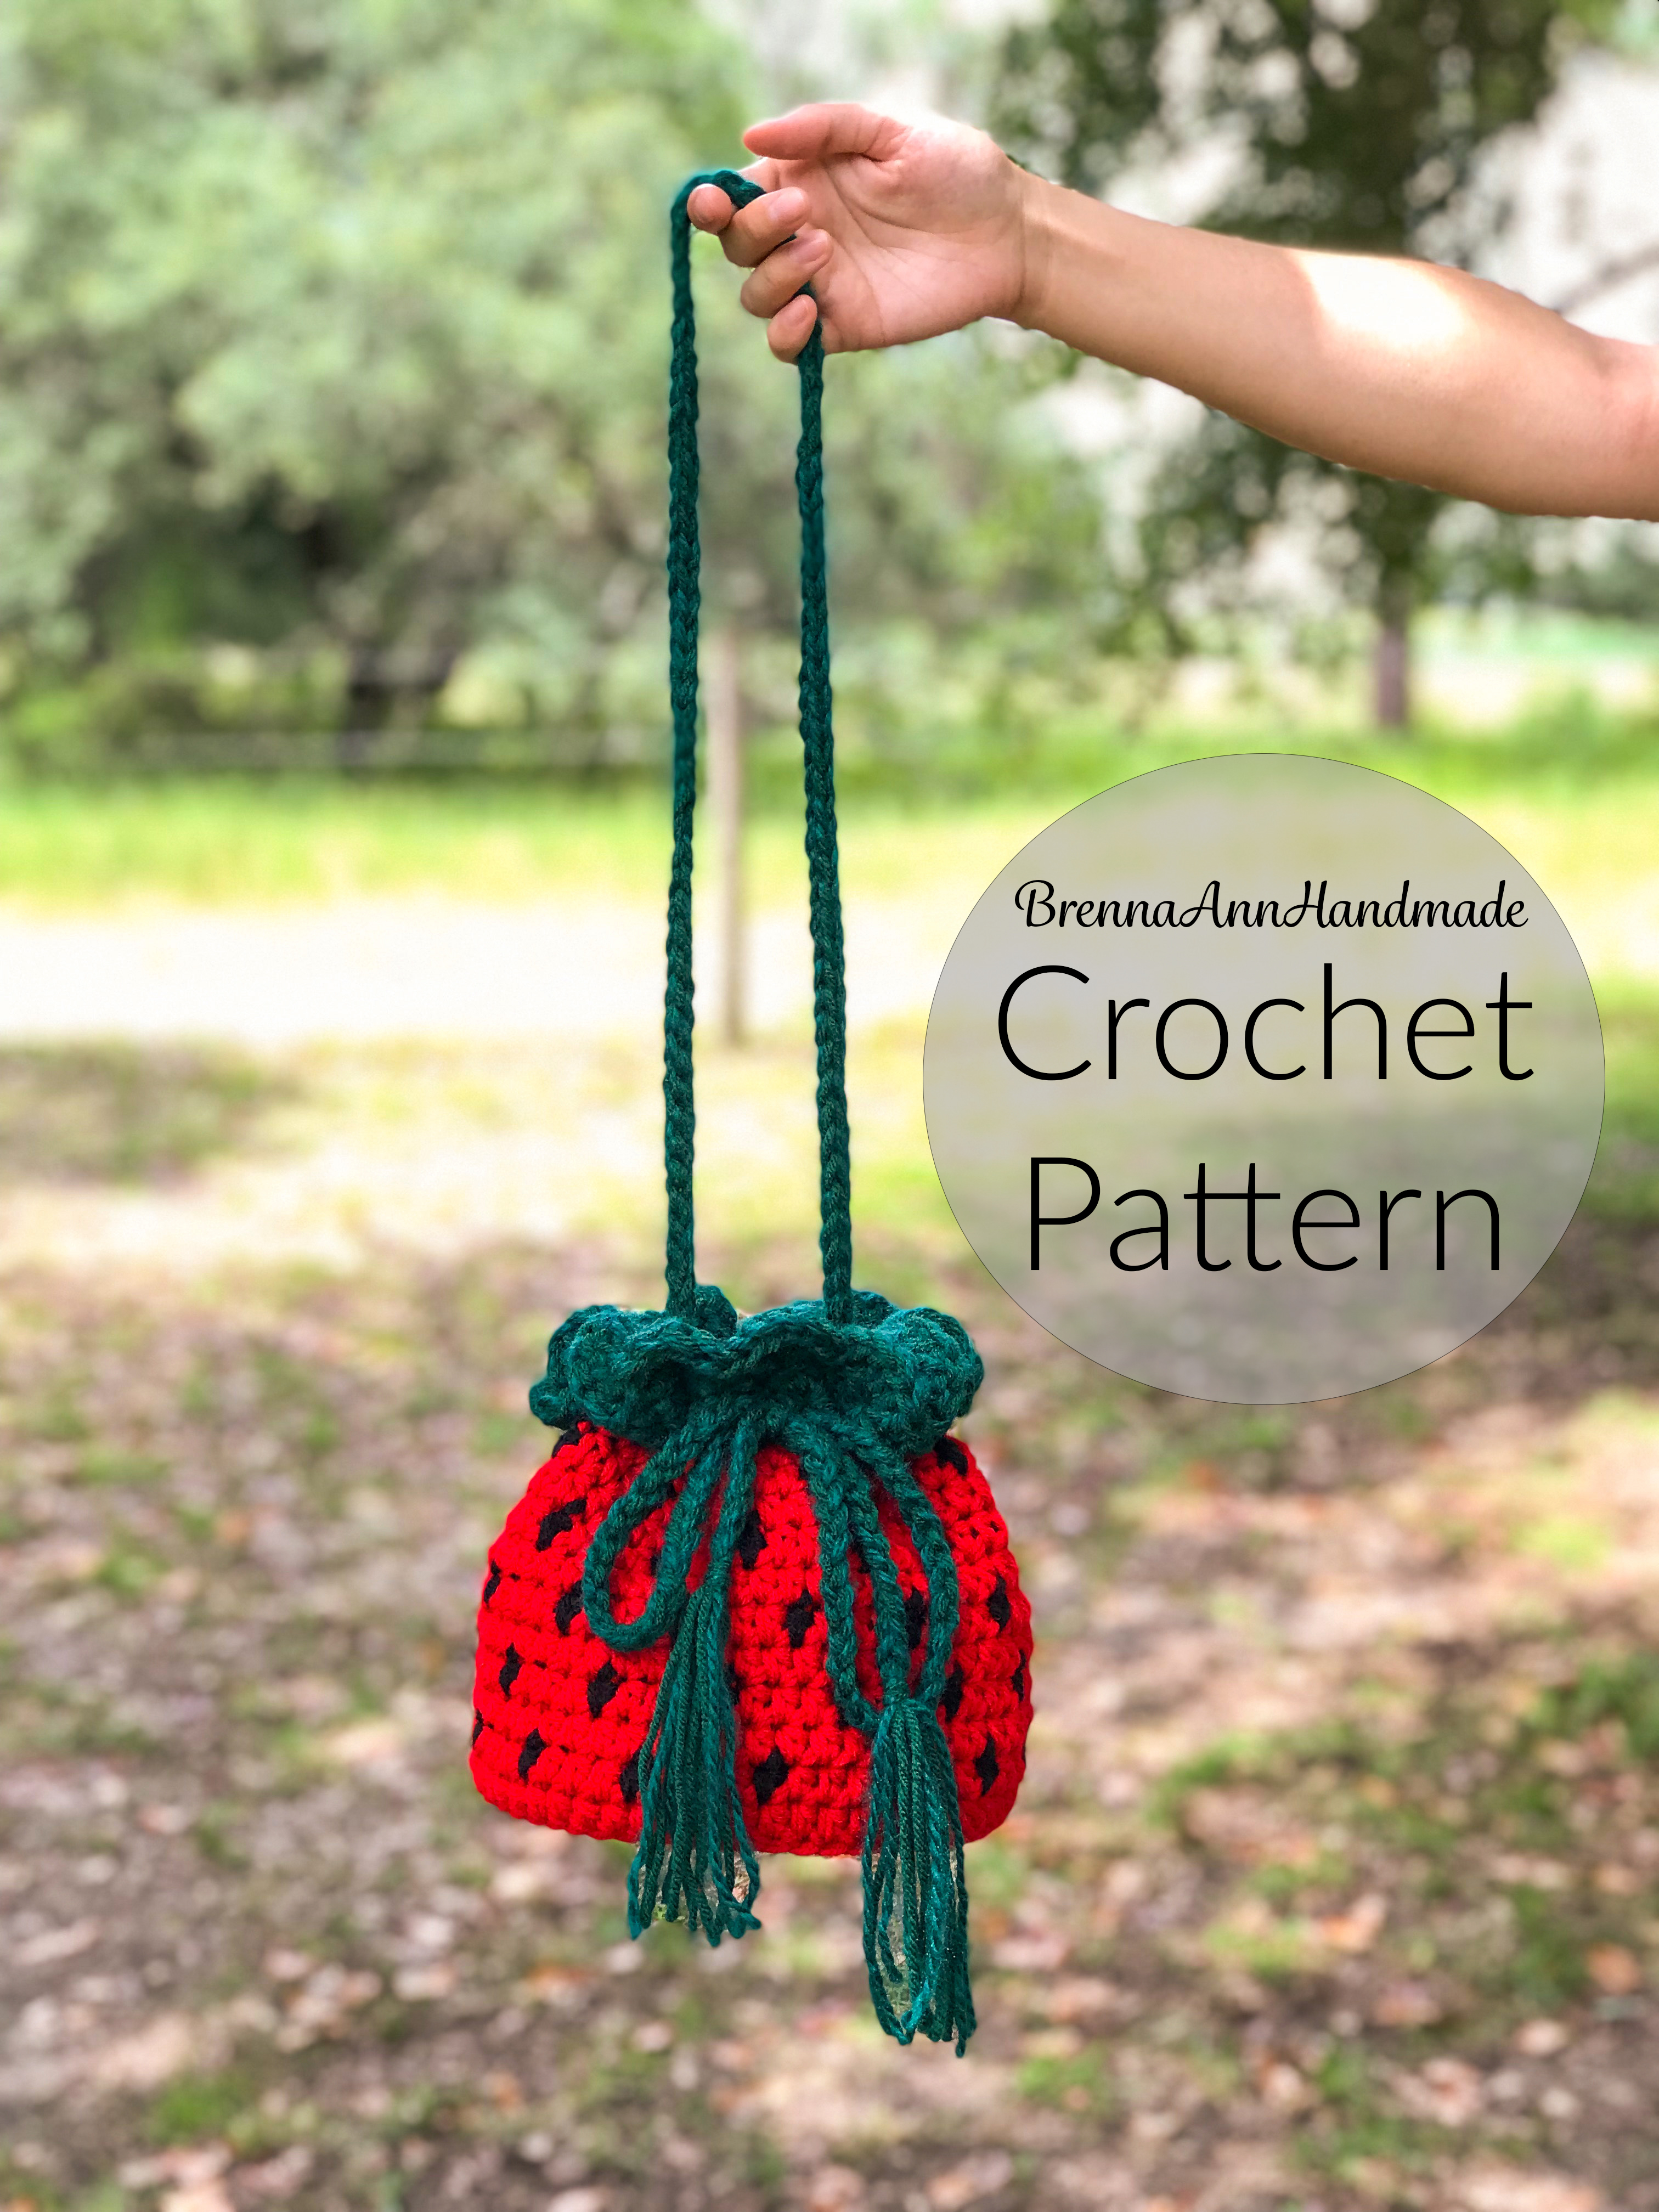
🍓 The Summer Strawberry Purse Crochet Pattern by BrennaAnnHandmade 🍓
*Finished bag measures approximately 7.5” wide x 7.5” tall*
Materials Needed:
-A 9mm crochet hook
-Worsted weight #4 yarn in the following colors - 1 skein (364 yds) red yarn, 1 skein (364 yds) black, and 2 skeins ( 184yds each) green. I used Red Heart Super Saver for all colors & a soft fuzzy green yarn held with Super Saver green for the green parts of the bag.
-Scissors
-A tapestry needle or smaller crochet hook to weave in ends
Abbreviations:
Ch = chain
Sl St = slip stitch
sc = single crochet
hdc = half double crochet
dc = double crochet
Notes:
- Yarn is held “doubled” throughout the entire pattern, by pulling from both ends of the skein at the same time.
- For a video instruction on how to crochet in the back & 3rd loop, see my IG reel here: https://www.instagram.com/reel/CiLFvU2ImBG/?igshid=YmMyMTA2M 2Y=
- For a video instruction on how to change & carry colors in crochet, see my IG reel here: https://www.instagram.com/reel/CiRJNz9qWNV/?igshid=YmMyMTA2 M2Y=
Directions: (Starting with red yarn)
Round 1: Ch 3, and put 7 hdc in the 1st ch made. Sl St into the top of the beginning ch 3 to join the round. (8 hdc total)
Round 2: Ch 2, and put 1 hdc in the SAME stitch. Crochet 2 hdc in each stitch around. Sl St into the top of the beginning ch 2 to join the round.
Round 3: Ch 2, and put 1 hdc in the same stitch. *Crochet 1 hdc in the next stitch, then 2 hdc in the next stitch. Repeat from * all around. Sl St into the top of the beginning ch 2 to join the round.
Round 4: Ch 2, and put 1 hdc in the same stitch. *Crochet 1 hdc in each of the next 2 stitches, then 2 hdc into the next stitch. Repeat from * all around. Sl St into the top of the beginning ch 2 to join the round.
Round 5: Ch 2, and put 1 hdc in the same stitch. *Crochet 1 hdc in each of the next 3 stitches, then 2 hdc into the next stitch. Repeat from * all around. Sl St into the top of the beginning ch 2 to join the round.
Round 6: Ch 2, and put 1 hdc in the same stitch. *Crochet 1 hdc in each of the next 4 stitches, then 2 hdc into the next stitch. Repeat from * all around. Sl St into the top of the beginning ch 2 to join the round.
Round 7: Ch 2, and put 1 hdc in the same stitch. *Crochet 1 hdc in each of the next 5 stitches, then 2 hdc into the next stitch. Repeat from * all around. Sl St into the top of the beginning ch 2 to join the round.
Round 8: Ch 2, and put 1 hdc in the back & 3rd loop of the same stitch, and in each stitch around. (This will cause your work to stand up from the base of the basket, and form the sides of the purse.) *See the pictures below showing where the back and 3rd loop is. When you reach the end of the round, Sl St into the top of the beginning Ch 2 to join the round. (56 st total)
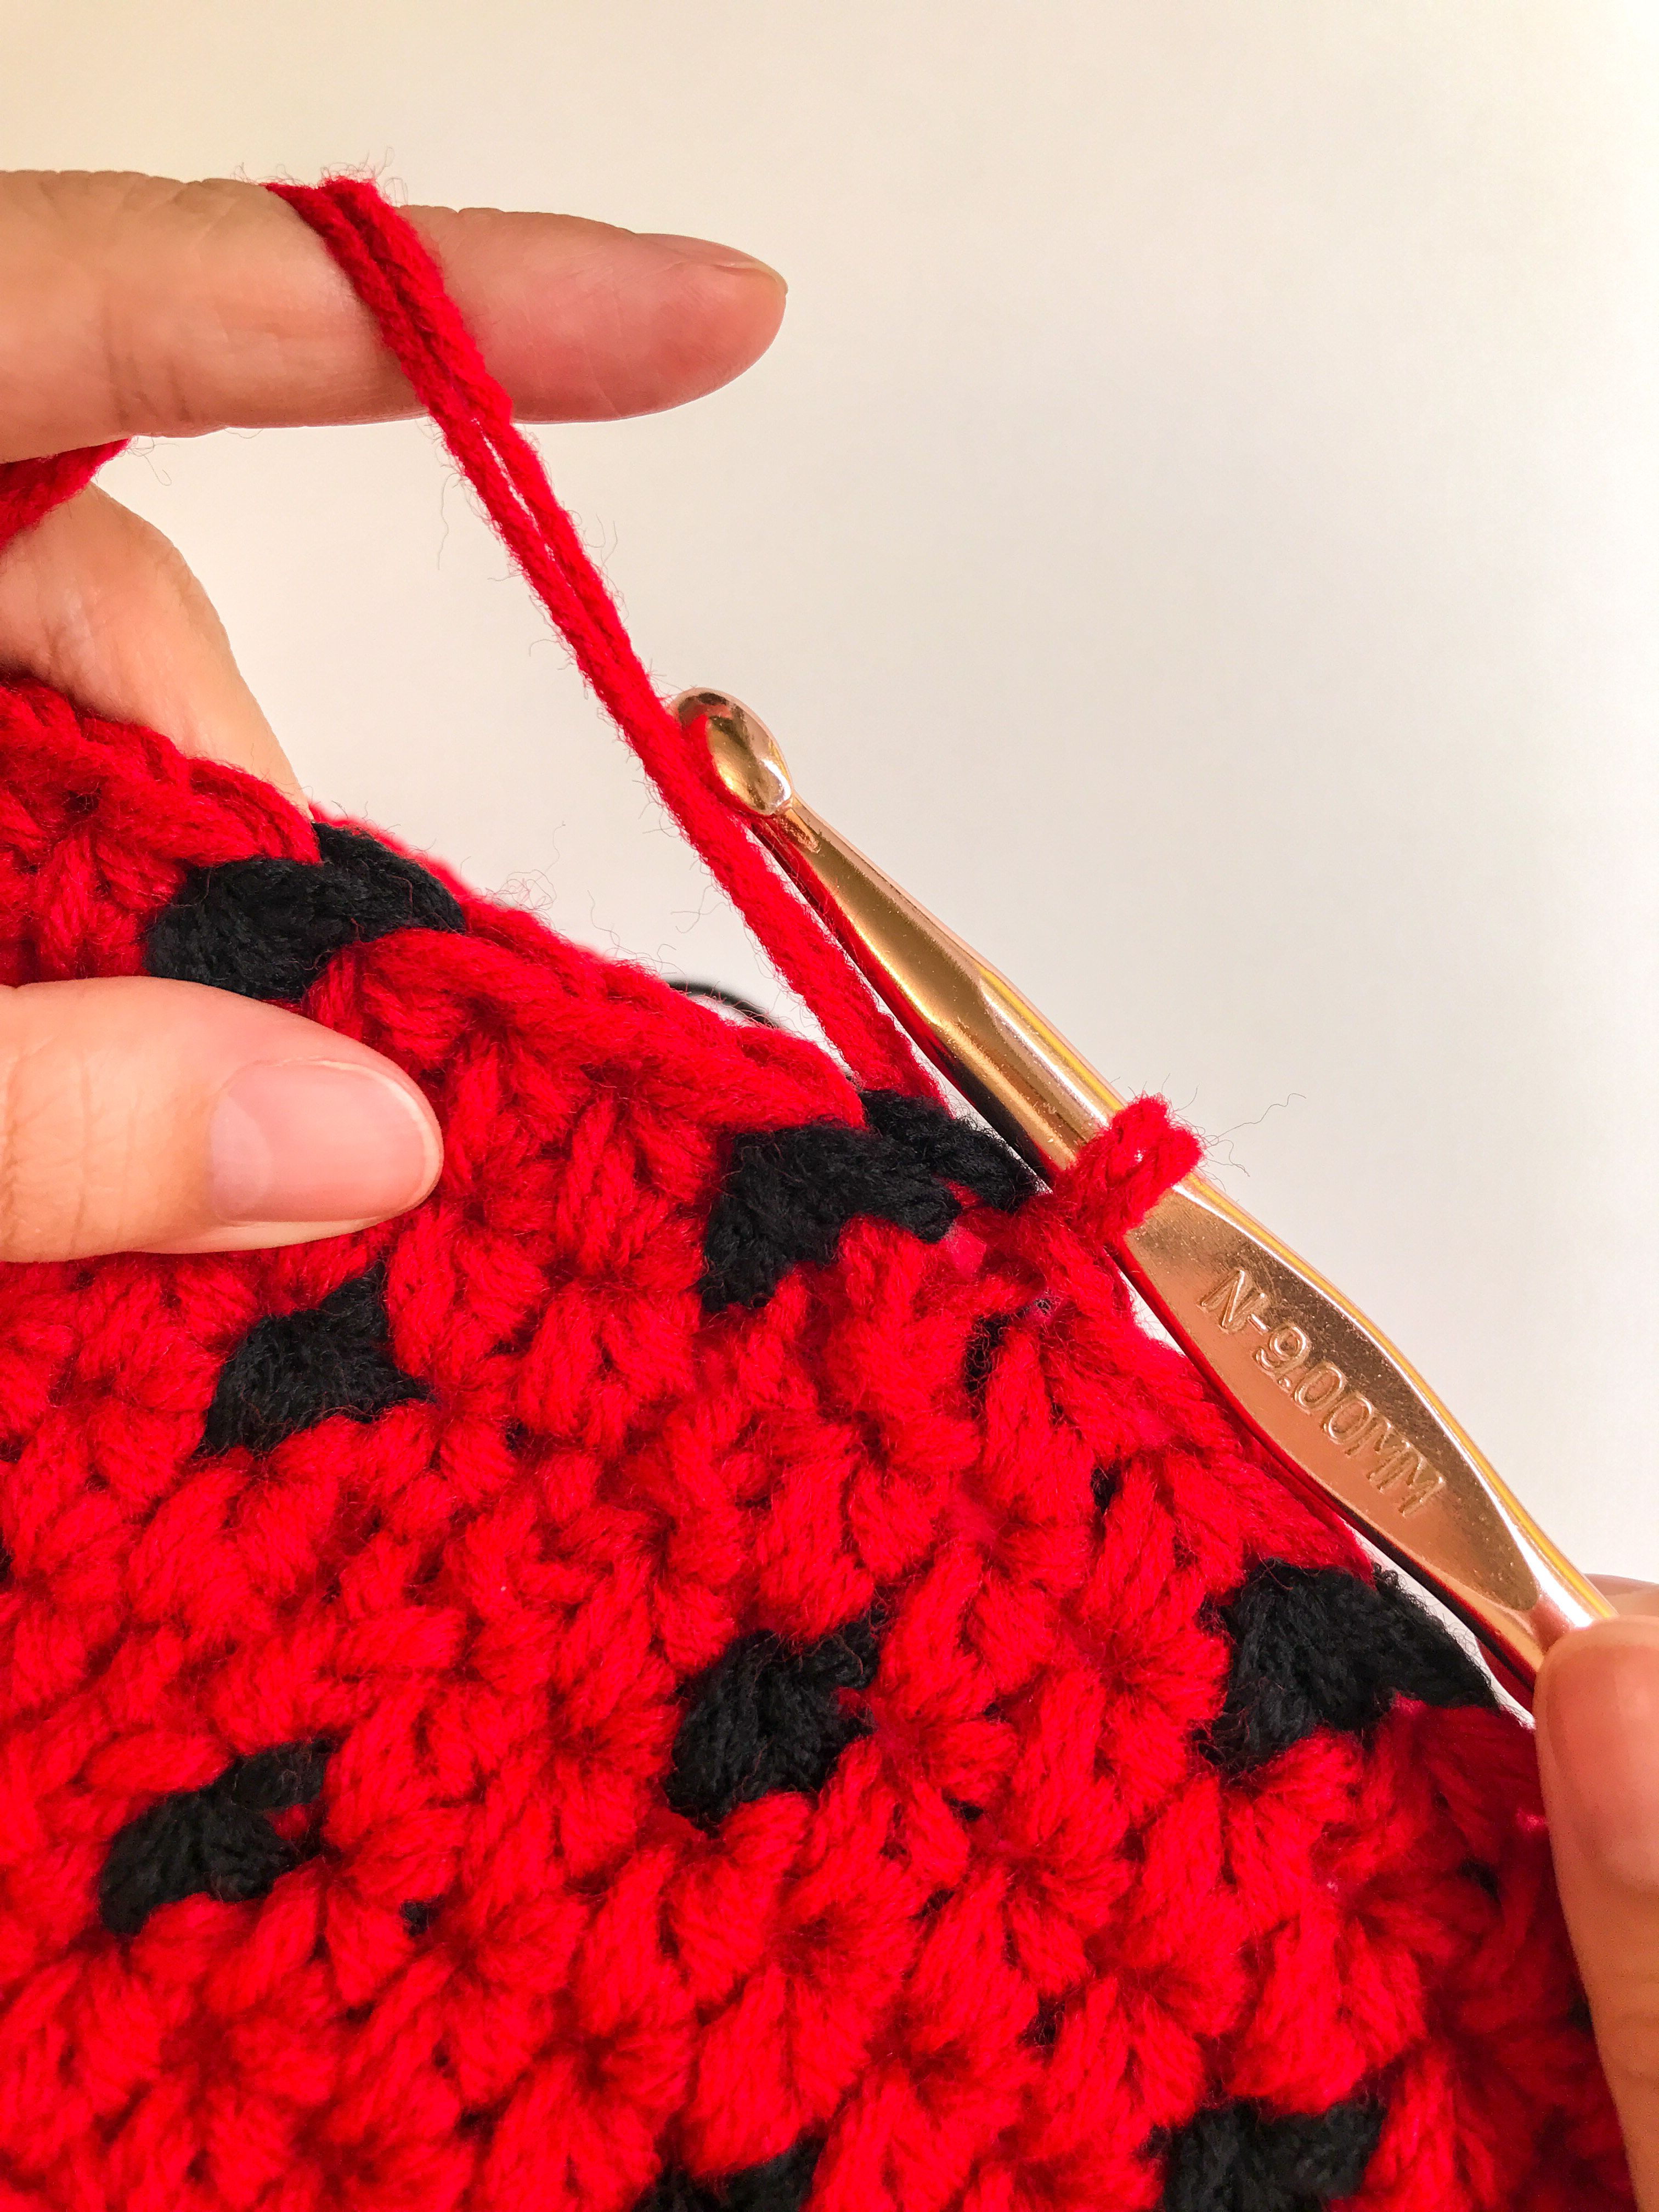
Here my finger is pointing to the "regular" front & back loops you'd normally put your stitch into:

Here my finger is pointing to the "back & 3rd loops" you'll be placing the 8th round of stitches in:
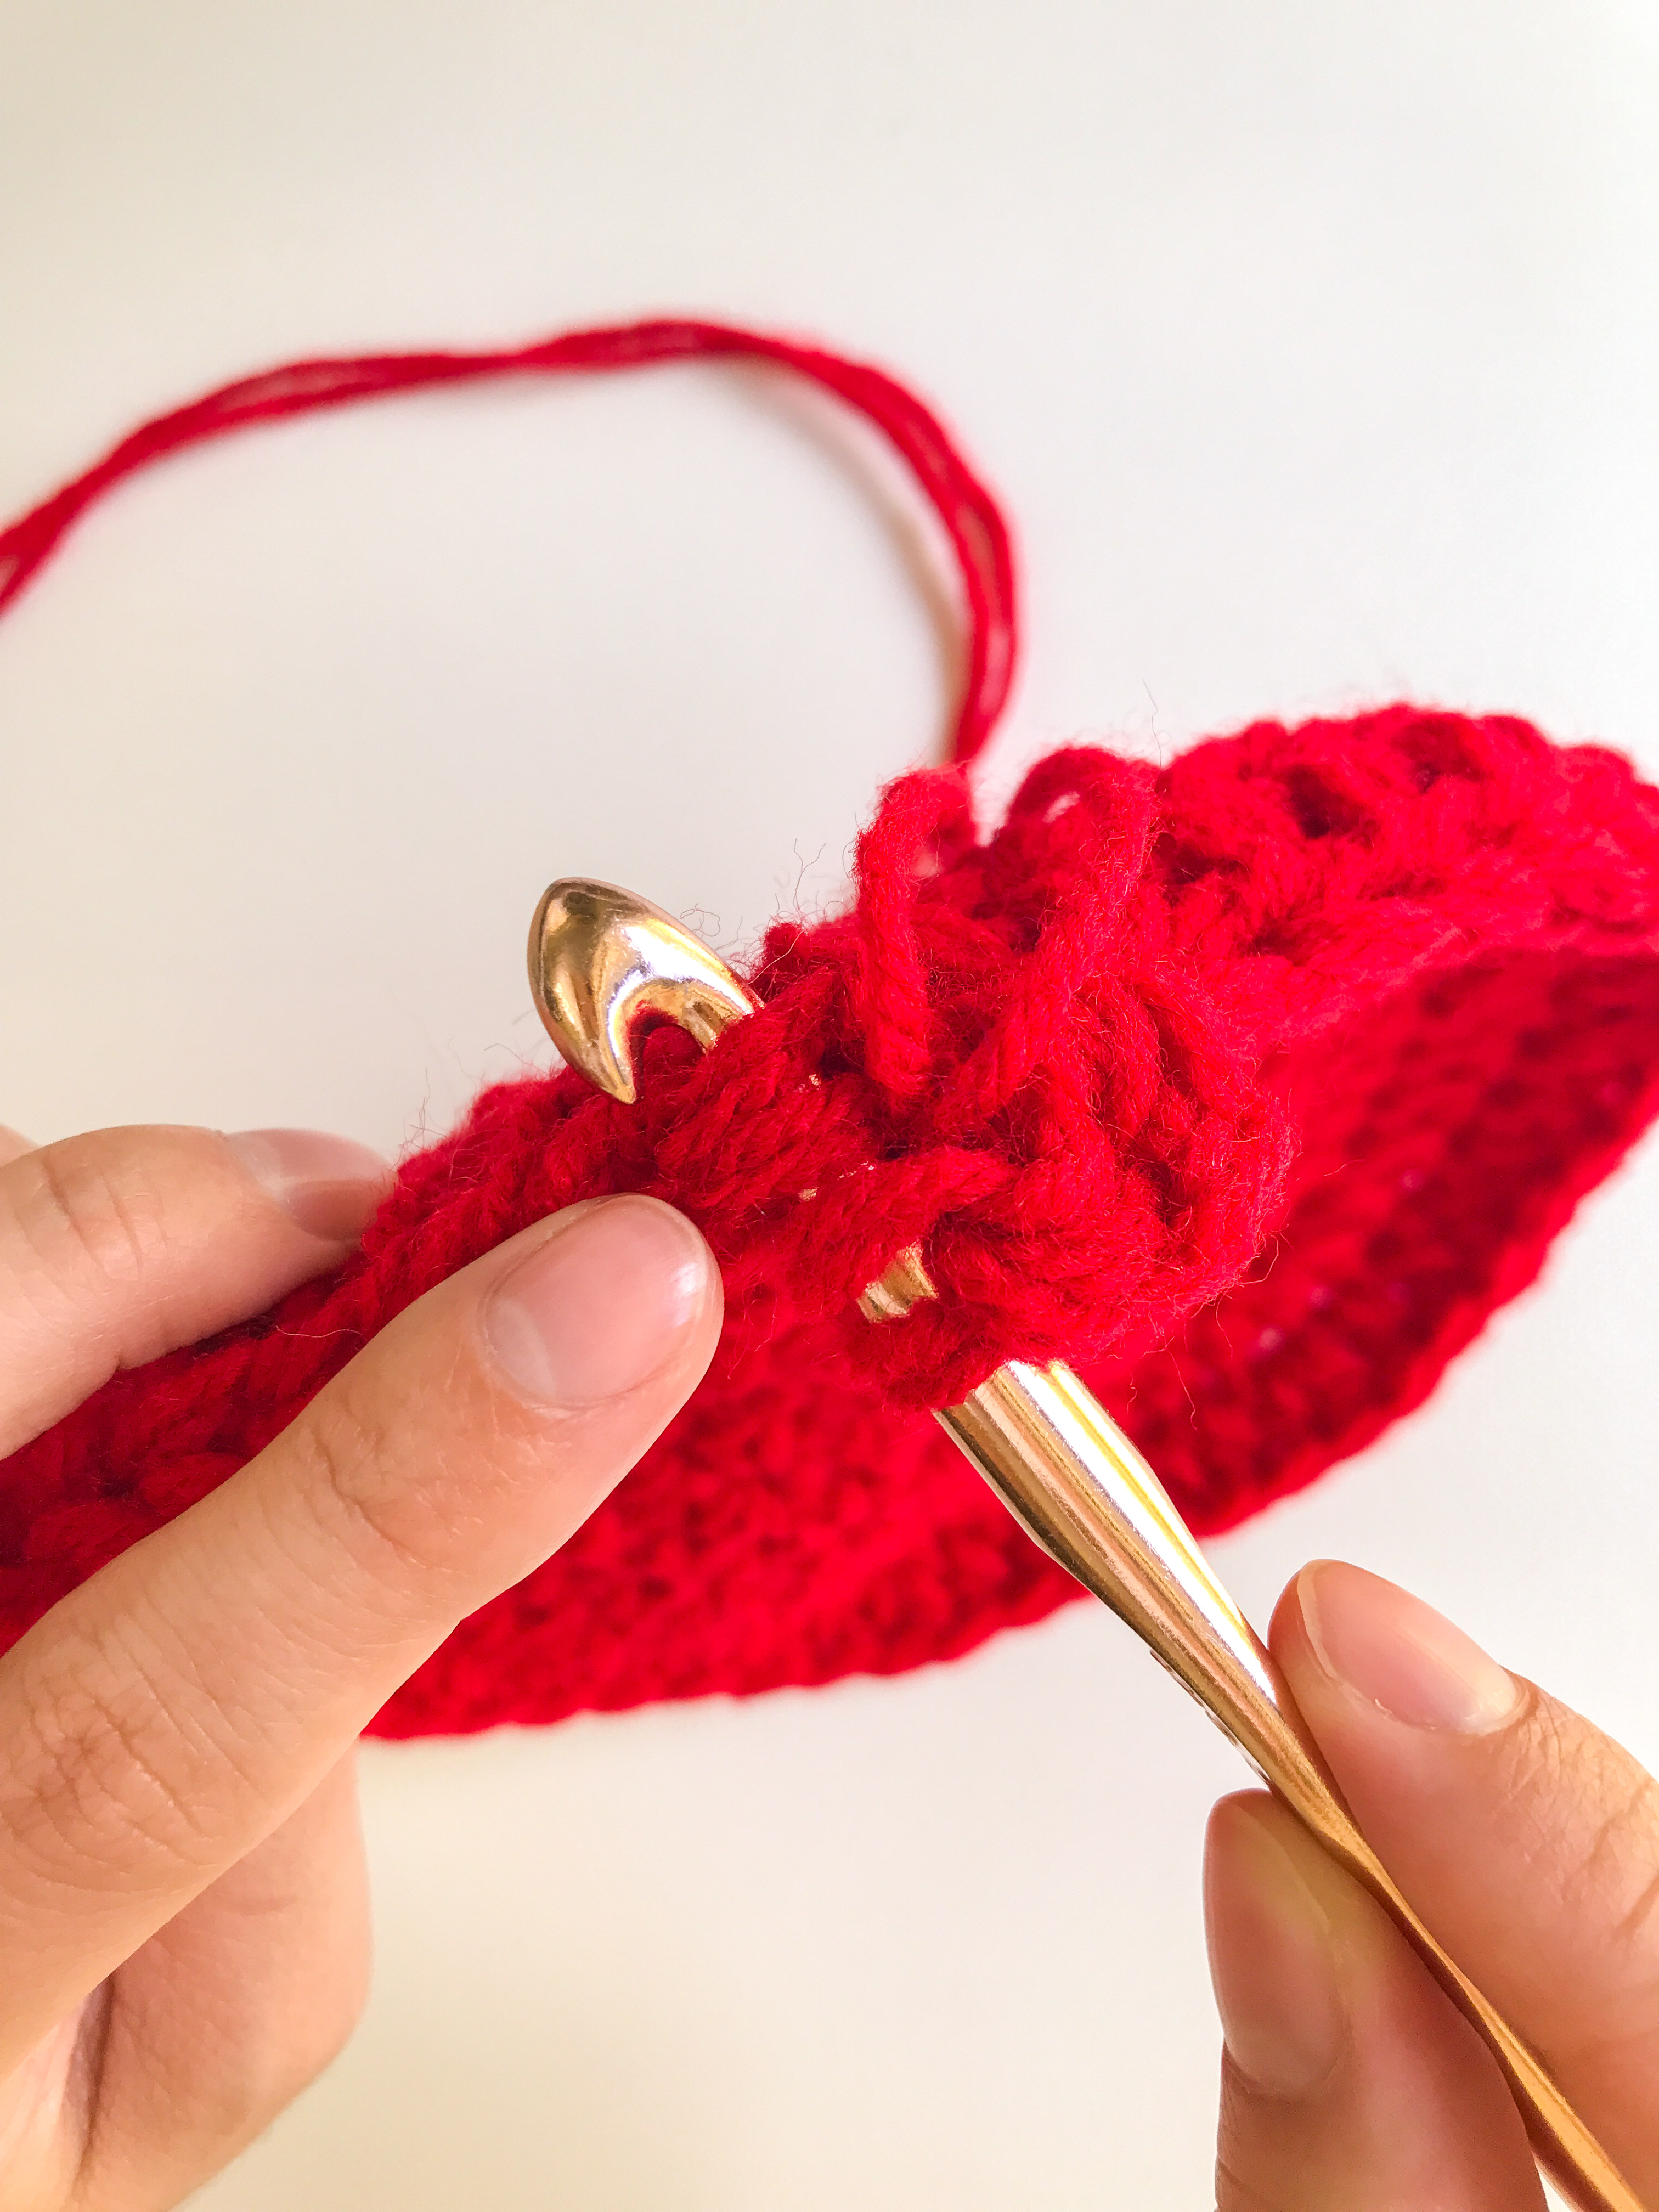
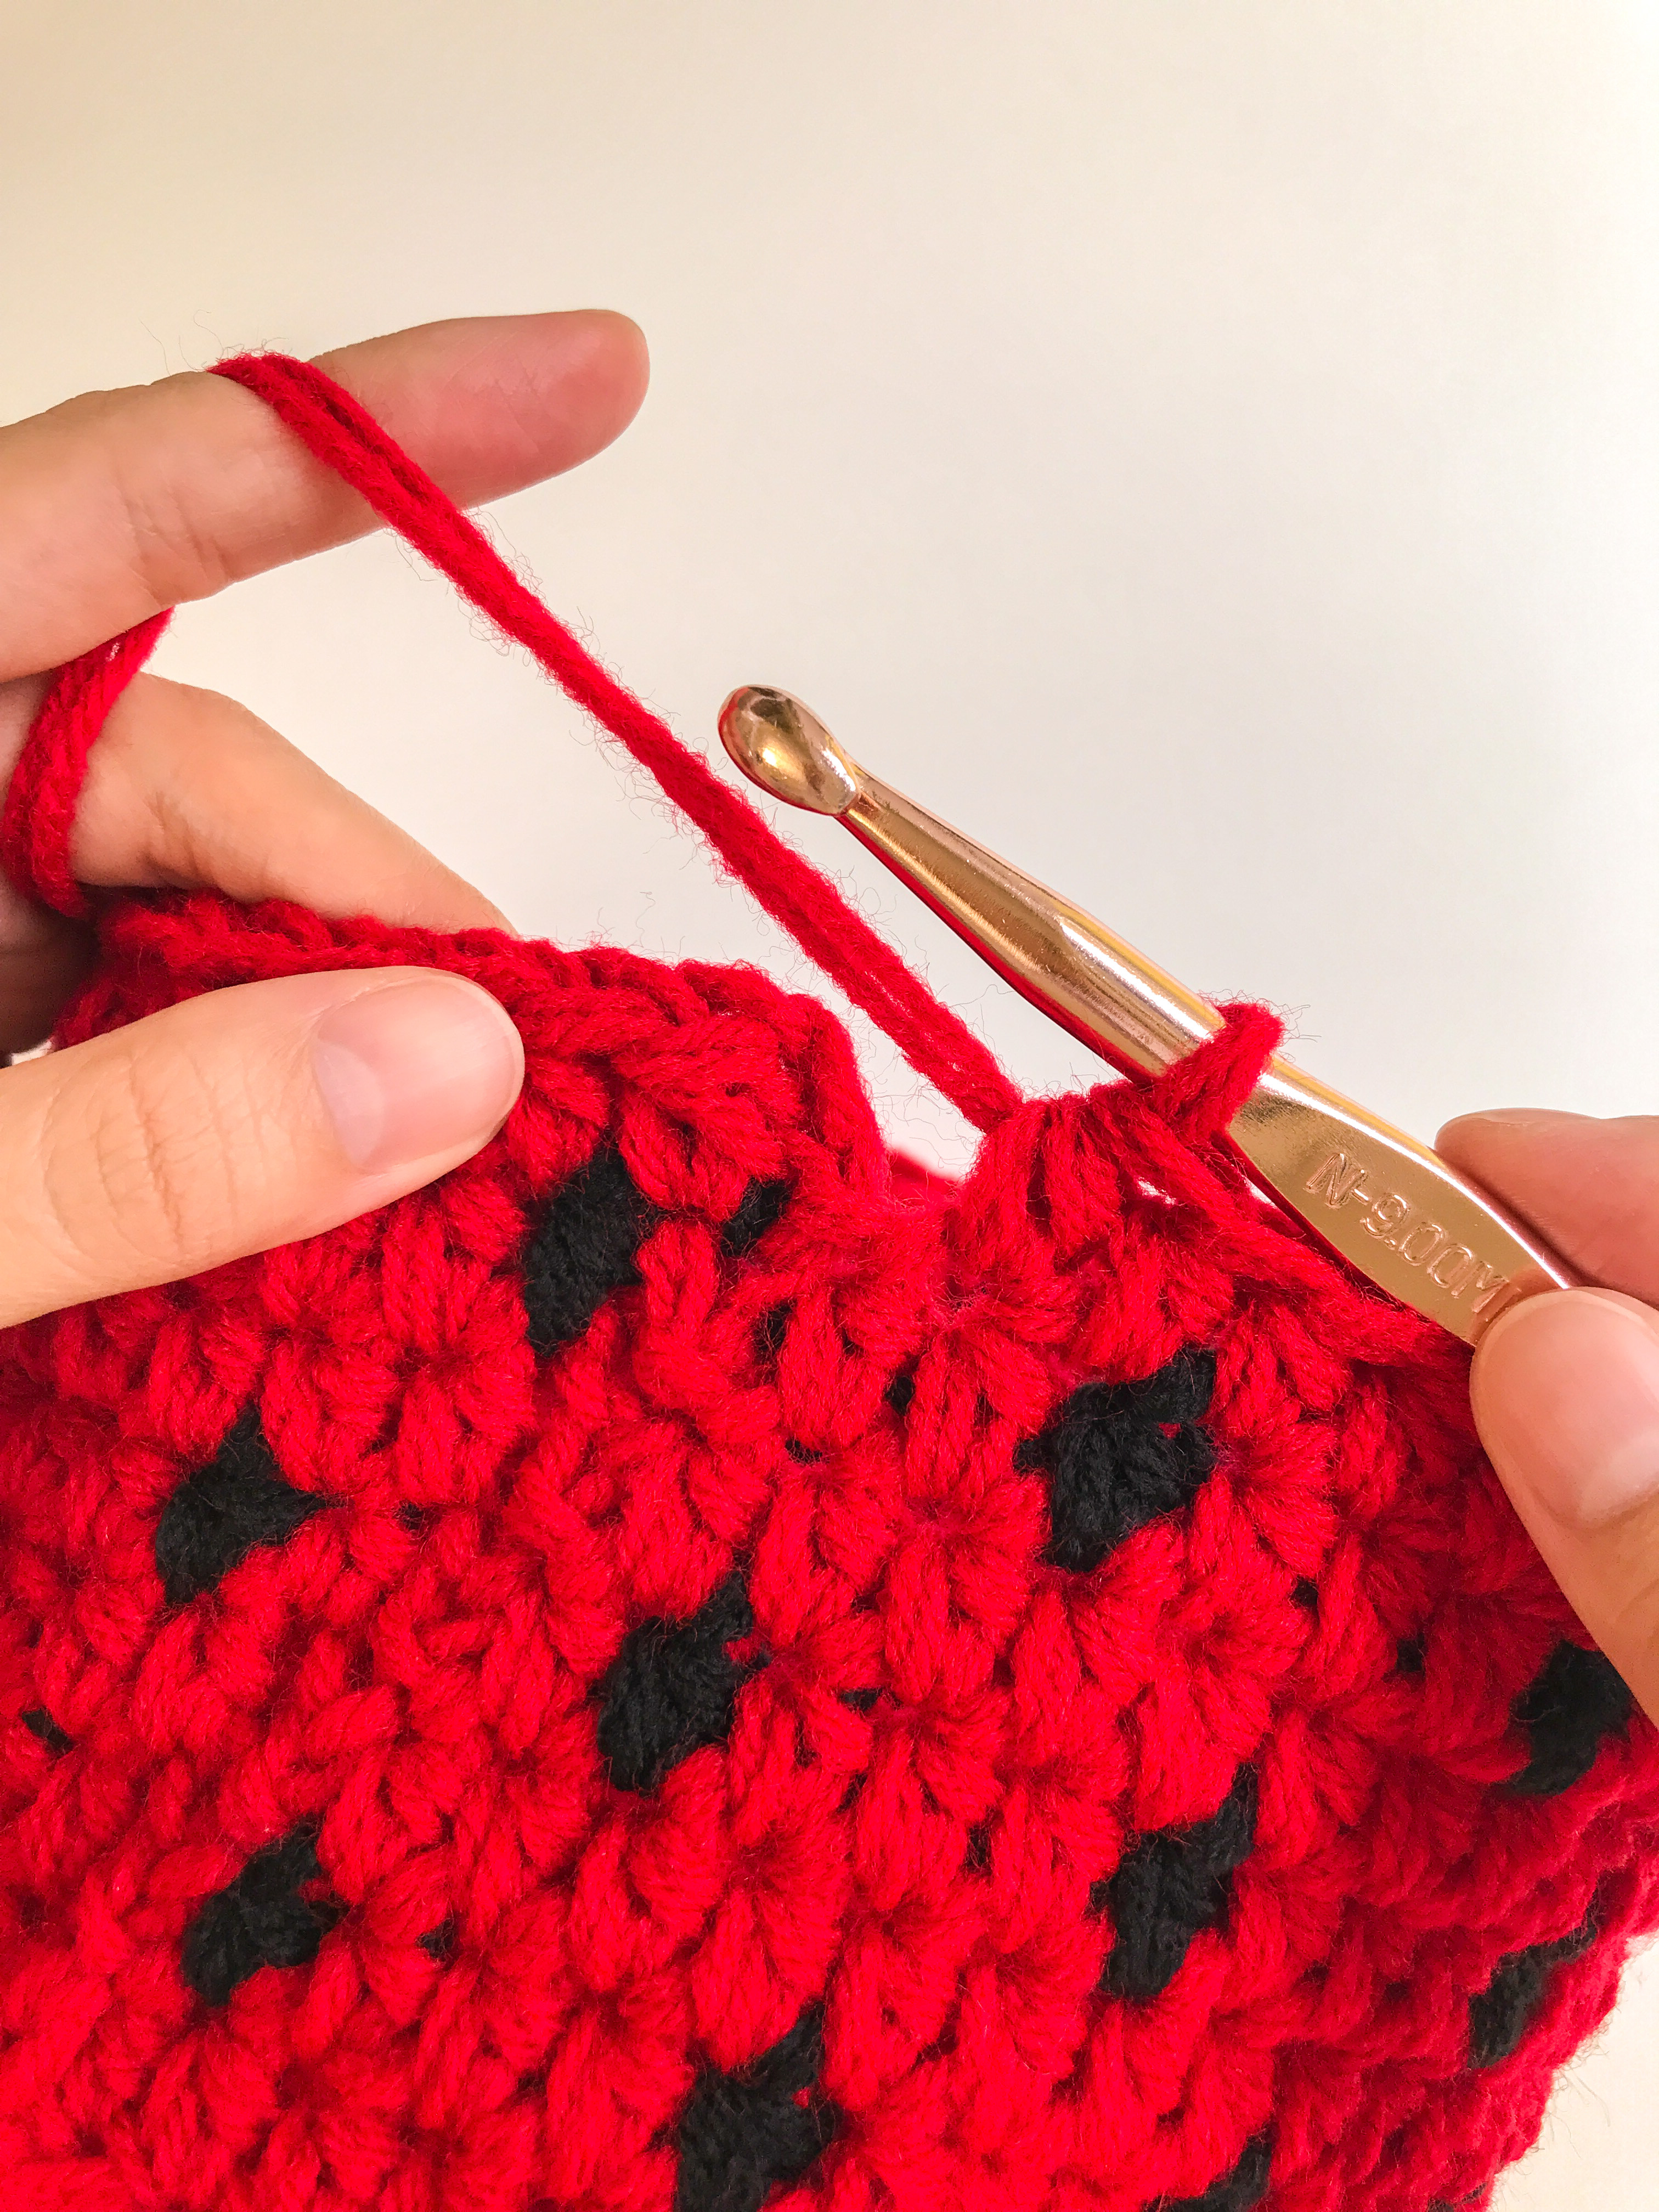
Here is what the completed stitches will look like, when placed in the "back & 3rd loops" they'll "stand up" from the previous "base" stitches of the bag, starting the "sides" of the bag:

*In the following rounds, you will be switching between yarn colors to create the “seeds” of the strawberry. Please see the note below for how to change colors.
Note: As you are finishing the last st of the old color, complete the last “yarn over and pull through” of that stitch by “pulling through” the new color instead of the old color. See the pictures in the step-by-step instructions below, and the link in the notes at the top of this pattern for a video tutorial on this if needed. ;)
Note: Since we will be changing colors so often, do NOT cut and tie off each time you change colors, but instead “carry” the color you are not using behind your work in the inside of the purse. (Hold the color not being used alongside the “edge” of the row you are working & complete the stitch around it, so it’s hidden within the stitch)
Round 9: (Red) Ch 2 (counts as 1st st), (Red) work 1 Hdc in each of the next 2 st. When you complete the final "pull through" of the 2nd Hdc stitch, you will switch to the black yarn:

Then, (Black) work 1 hdc in the next st, completing the final "pull through" of that stitch with the red yarn:
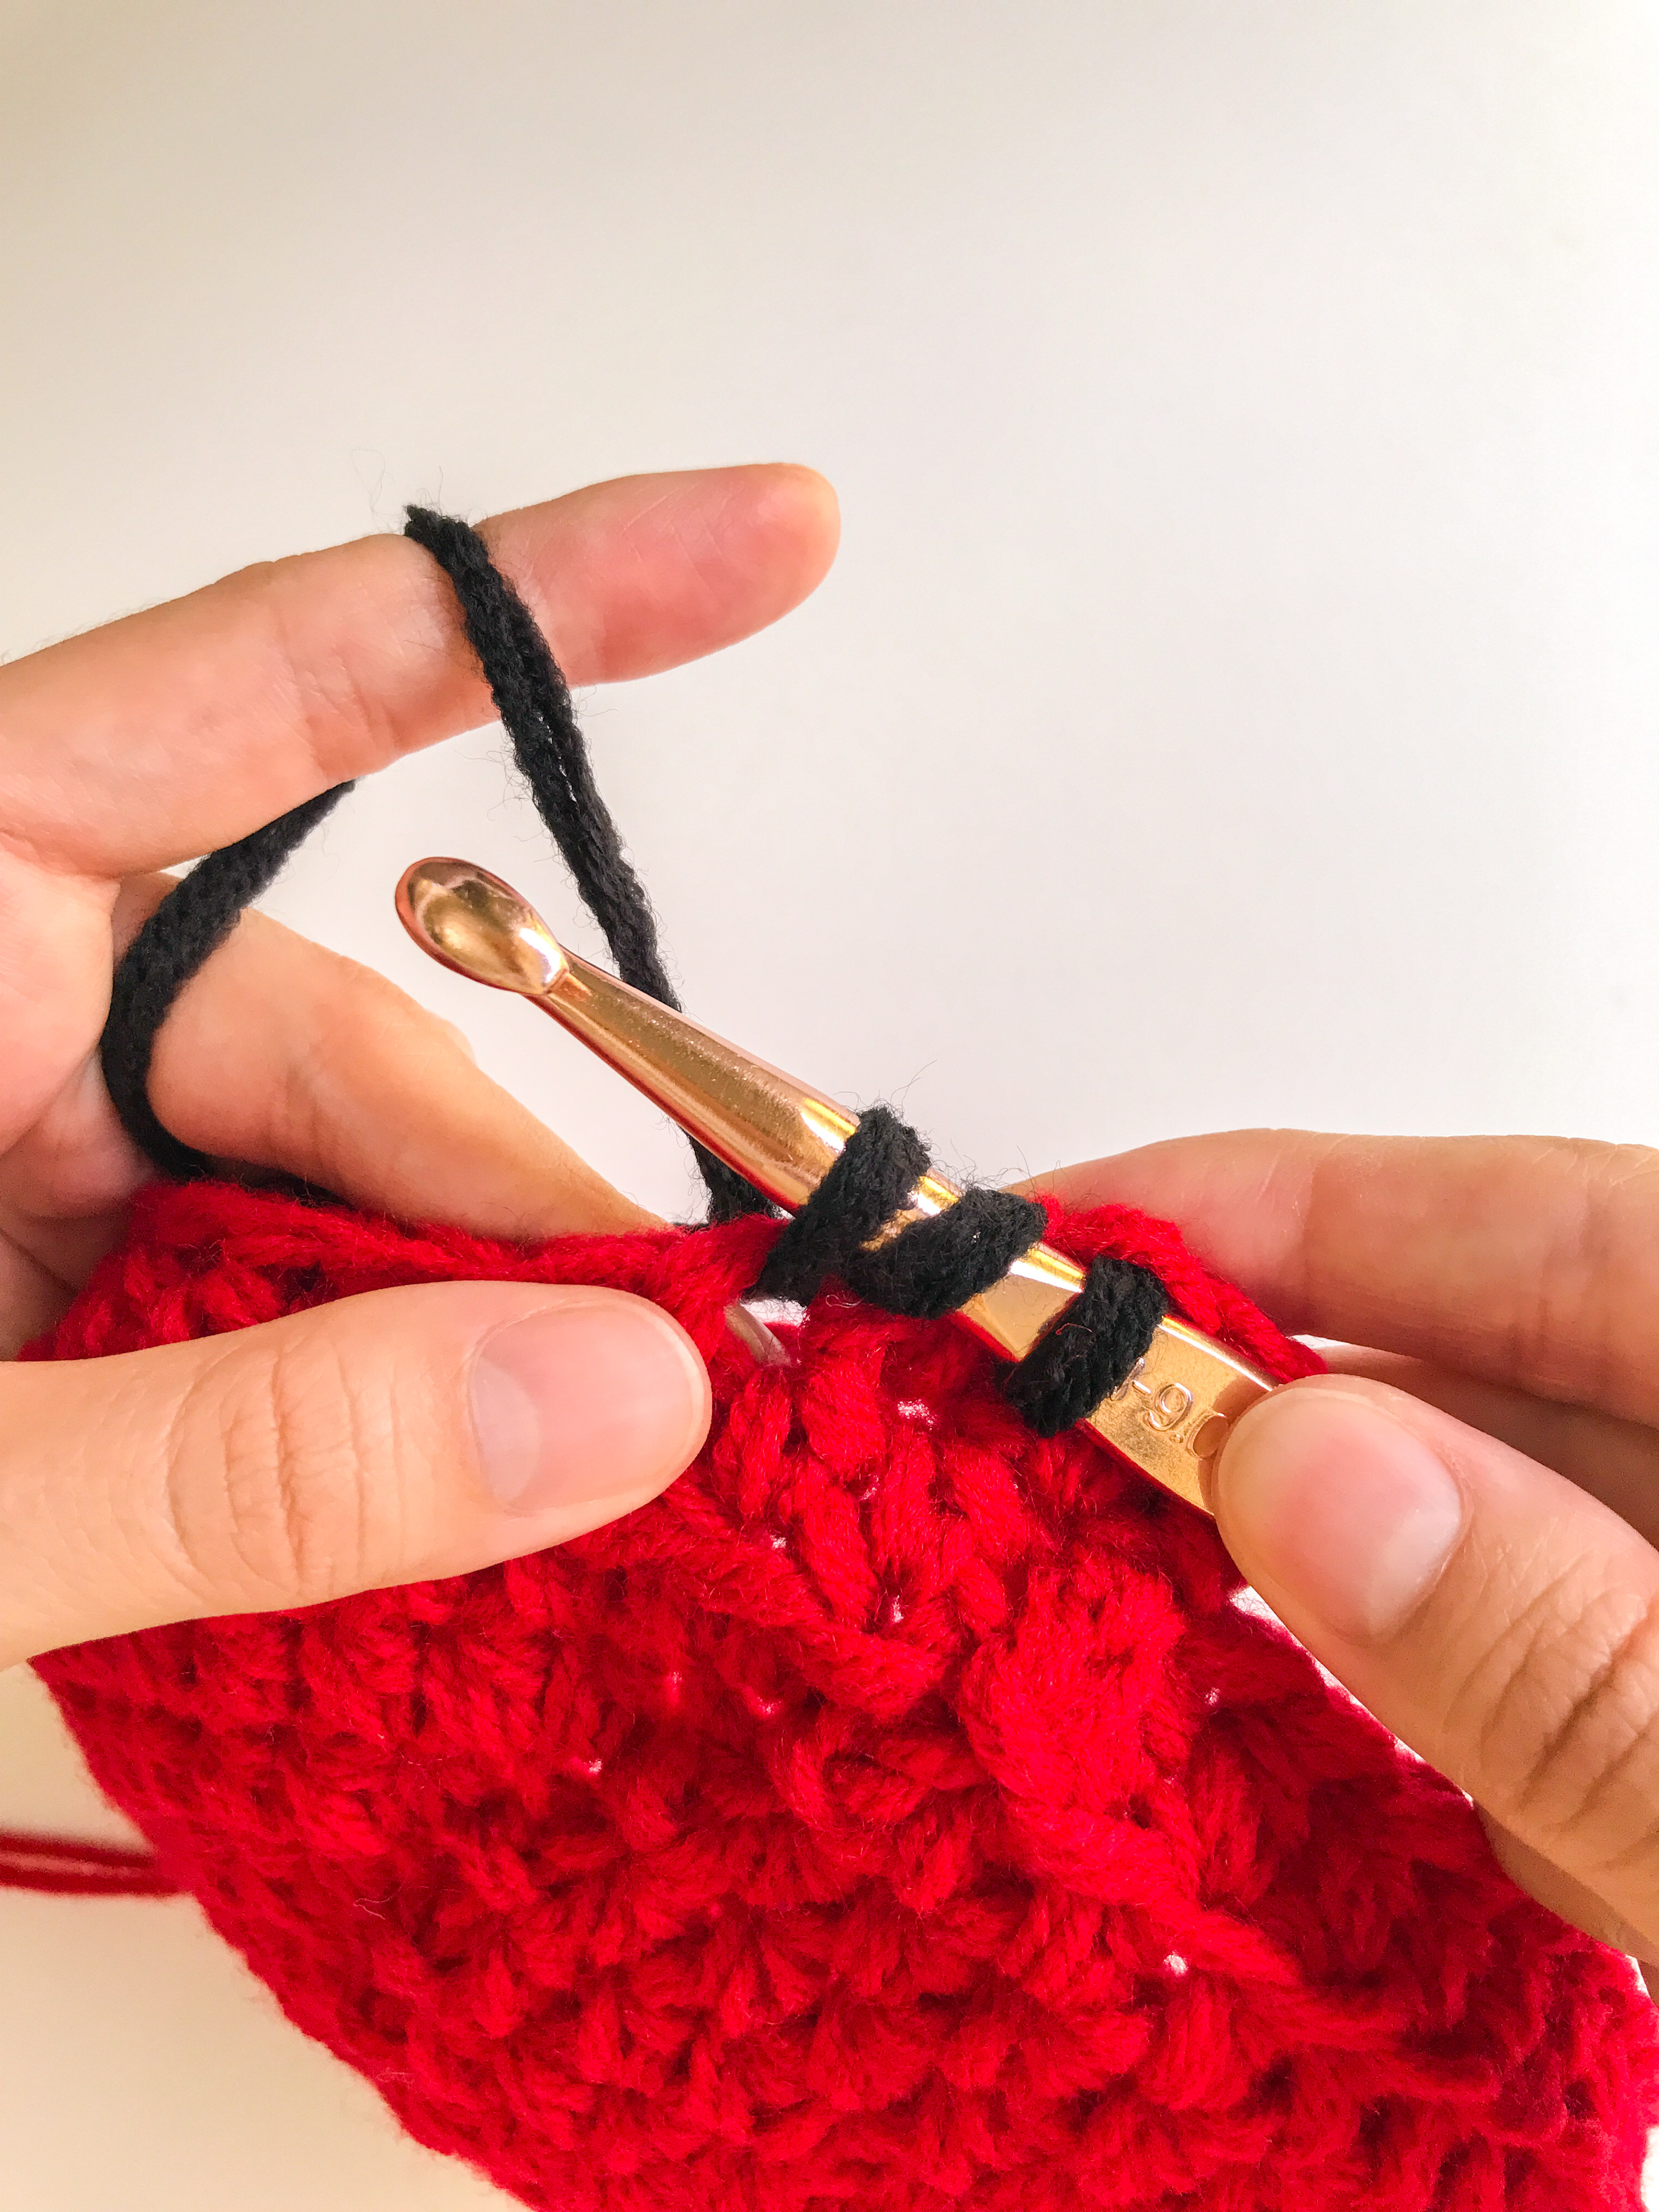

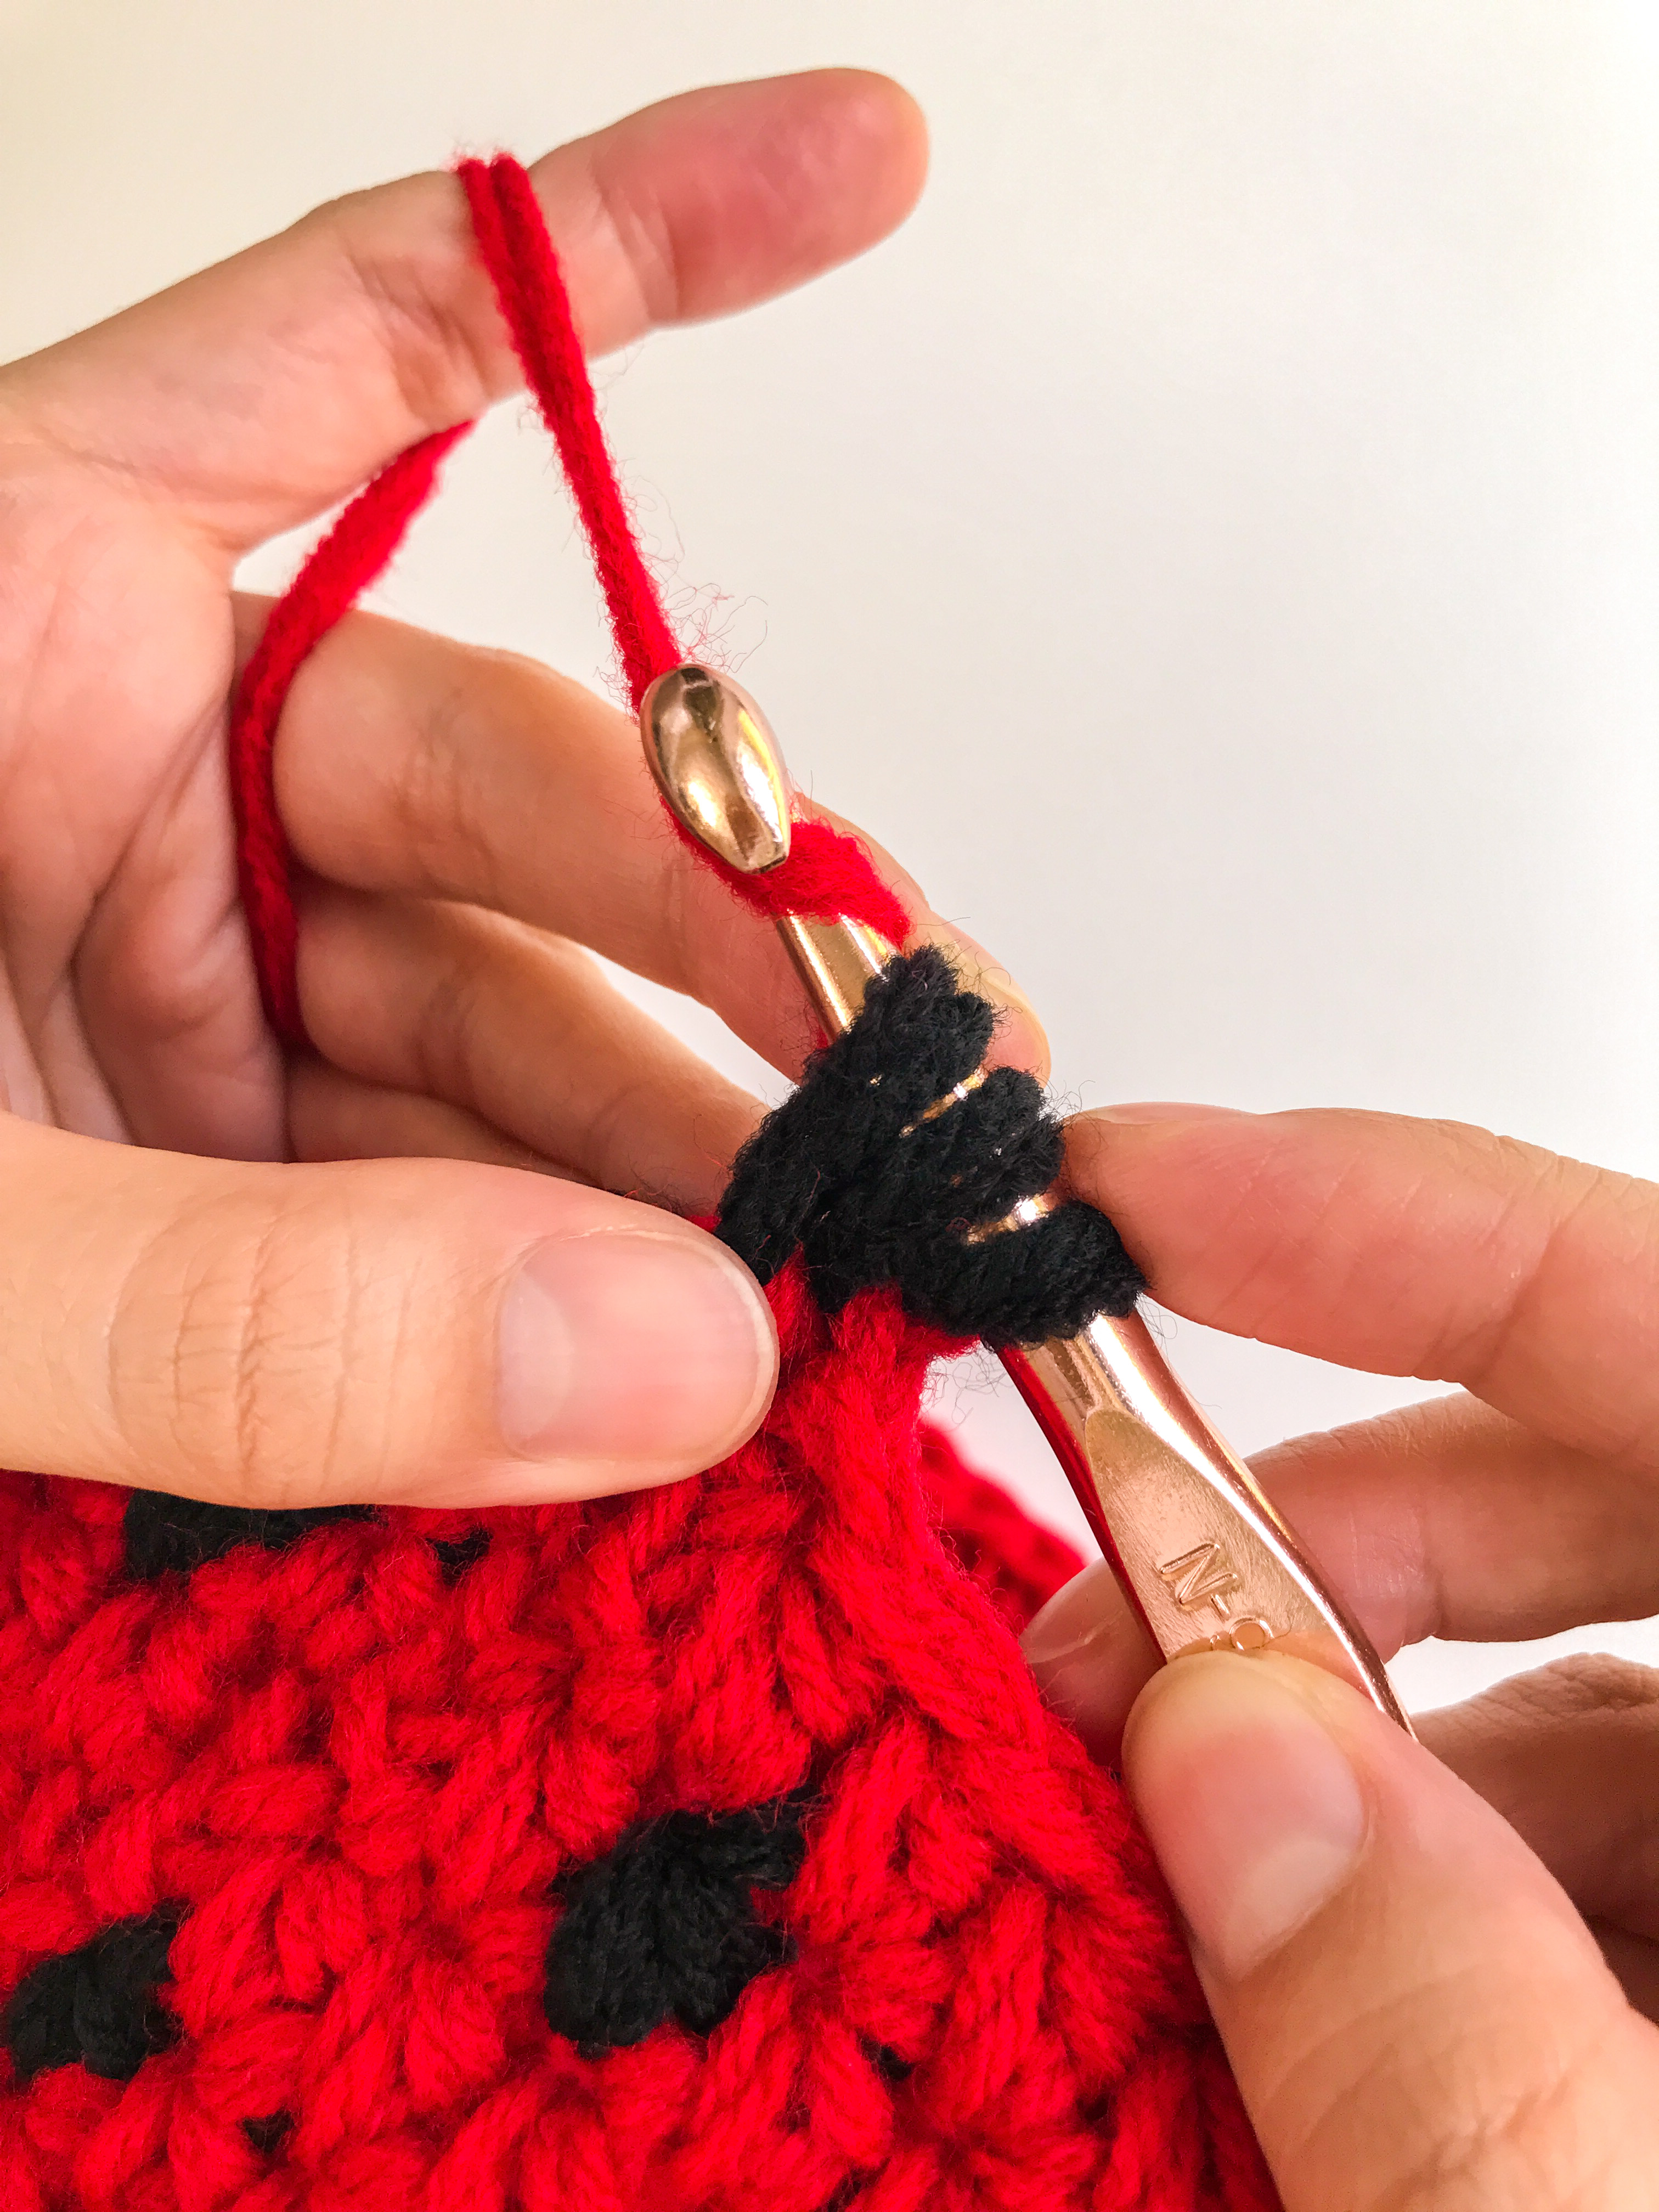
You will continue the pattern sequence by completing *3 red hdc, & then 1 black Hdc*, repeating from * to * around the entire round. (Hold the color not being used alongside the “edge” of the row you are working & complete the stitch around it, so it’s hidden within the stitch) Here is how to "switch back" from the red yarn, to the black yarn, to back to the red yarn again:


Here's what it should look like on the "inside" of the purse:

Sl St into the top of the beginning ch 2 to join the round.

Round 10: (Red) Ch 2, Work 1 Hdc into each st around. Sl St into the top of the beginning ch 2 to join the round.

Round 11: (Red) Ch 2,

Then, work 1 hdc into the next st. On the final "pull though" of that stitch, switch to the black yarn & use that to "pull though" & complete that stitch:

Here is what the "inside" of the bag will look like, carrying the black yarn from the previous round that you used it, to this new round:

(Black) work 1 hdc into the next st, using the red yarn to complete the final "pull though" of that stitch:

(Red) work 1 hdc into the next st, *(Red) work 1 hdc into each of the next 2 st, (Black) work 1 hdc into the next st,

(Red) work 1 hdc into the next st*, repeat from * to * around. Sl St into the top of the beginning ch 2 to join the round.


Round 12: (Red) Ch 2, work 1 hdc into each st around. Sl St into the top of the beginning ch 2 to join the round.

Round 13: (Red) Ch 1,

(Black) Pull through and ch 1, (2 ch total),


(continue Black) work 1 hdc in next st, completing the last "pull though" of the stitch with the red yarn.

*(Red) work 1 hdc in each of the next 3 st, (Black) work 1 hdc in the next st,* continue from * around until you reach the last 2 st of the round, then (Red) work 1 hdc into each of the last 2 st. Sl st to top of beginning ch 2 to join the round.

Round 14: (Red) Ch 2, work 1 hdc into each st around. When you reach the last st of the round, switch to the black yarn before joining round & sl st to top of beginning ch 2 to join the round.


Round 15: (Black) Ch 1,

(Red) ch 1,


*(Red) Work 1 hdc into each of the next 3 st, (Black) work 1 hdc in the next st*,

continue from * to * around & sl st to top of beginning ch 2 to join the round.
Round 16: (Red) Ch 2, work 1 hdc into each st around. Sl St into the top of the beginning ch 2 to join the round.
Round 17: Repeat row 9.
Round 18: (Red) Ch 2, work 1 hdc into each stitch around.

Sl st with the GREEN yarn into the top of the beginning ch 2 to join the round:
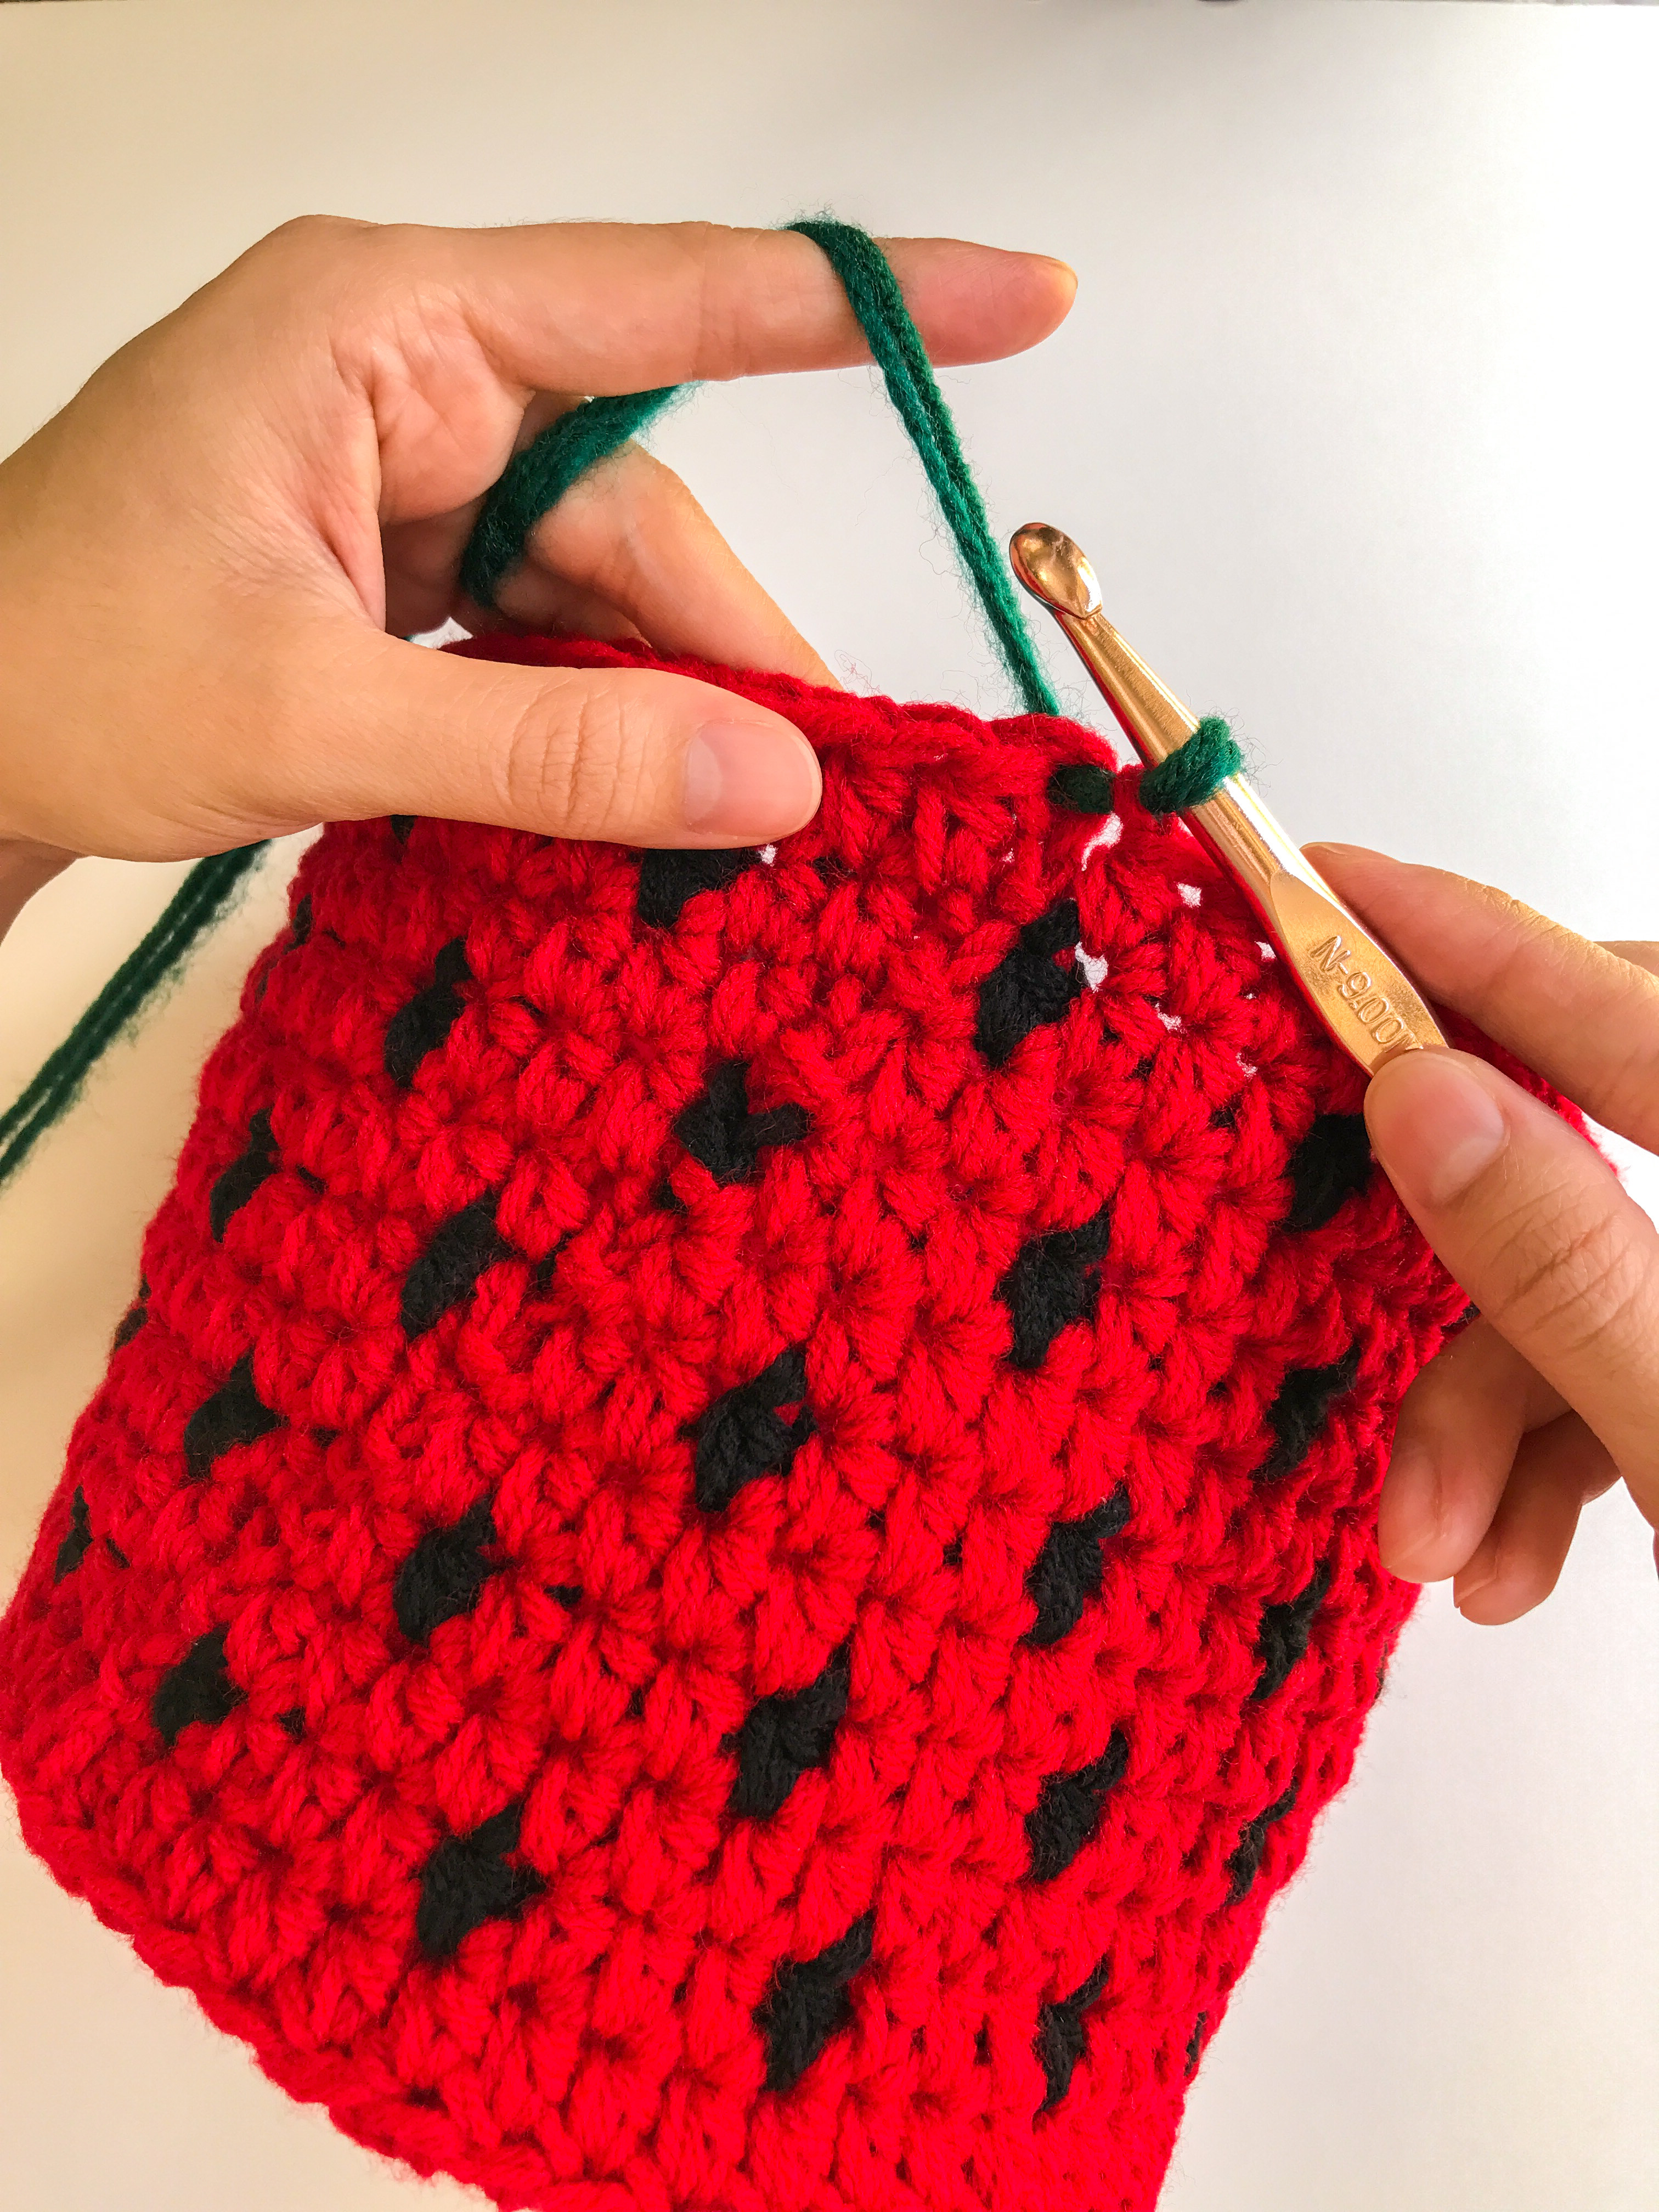
Round 19: (Green) Ch 3, *skip 1 stitch, work 1 hdc in the next stitch, ch 1. Repeat from * all around. Sl st to the 2nd ch (of the ch 3) at the beginning of the round to join.
Round 20: Ch 2, work 1 hdc in the SAME stitch. *Work 1 hdc in the ch space from the previous round, and then work 1 hdc on top of the hdc from previous round. Repeat from * around. Sl St into the 1st stitch at the beginning of the round to join.
Round 21: Ch 1, work 1 sc in the SAME stitch. *Skip 1 st, work 5 dc in the next stitch, skip 1, work 1 sc in the next stitch. Repeat from * around. Sl st to the beginning sc to join the round. Cut yarn and tie off. Weave in all ends.
Cinch Tie Directions:
Step 1: (Green) Ch 100, cut yarn (leaving a 5" tail) and pull through to secure.
Step 2: Weave the tie you just made, in and out through the ch 1 spaces in round 19, until both ends are sticking out of the front of the purse together.
Step 3: Add a tassel bundle to one end of the tie by cutting 3 pieces of yarn 10" long, and attaching as follows: (using the crochet hook to help you) insert crochet hook from back to front, wrap the middle (half point) of your yarn bundle around, & pull the loop through (not all the way). Then, take the "tails" of the yarn & pull them through the loop you just created, tightening to create tassel. Repeat on the other end of the tie.
Purse Strap Directions:
Step 1: (Green) Attach yarn to one side of the purse with a sl st (it is easiest to attach it to one of the hdc stitches from round 19.)
Step 2: Ch 90, and attach to the other side of the purse with a sl st. (Make sure the drawstring tie is centered between the straps, when you attach the straps to the sides.)
Step 3: Sl st into each ch st all the way back to the other side of the purse (1st side you attached). Finish off & weave in all ends. All finished! 🍓
*Please Note: You may NOT resell/share this pattern or the pictures included, but you MAY sell the finished items made from them, as long as you use your own photos, and give credit to the original designer. ALL content, patterns, pictures, and designs are property of BrennaAnnHandmade 2014-infinity. To shop more patterns + finished knitwear, visit my shop: brennaannhandmade.etsy.com


Please feel free to contact me or comment below with any questions you may have concerning this pattern, I'm happy to help! 😊
Happy making everybody!
~Brenna🌻
No comments:
Post a Comment